Marine Latches and Deck Hardware: Keep Hatches Secure and Dry
A latch is a forgettable part until a hatch flies open in a chop. Compression, slam, cam, and locking latches, and how to match each one to the hatch it guards.
A hatch that flies open in a chop or leaks into storage is more than an annoyance. It is soaked life jackets, a flooded tackle locker, a lid slamming on someone's fingers, and on a bad day, a compartment full of water where buoyancy used to be. The right latches keep everything locked down and dry, and they cost a fraction of what the gear behind them is worth.
Latches are also one of those parts nobody thinks about until one fails. Here is how to pick hardware that keeps working in salt air, and how to match the latch type to what each hatch actually has to do.
Why Latches Fail on Boats
A latch on a boat lives a harder life than the same part anywhere else. Salt air works on every spring, pin, and pivot. UV cooks the polymer bits. The hatch it holds gets stepped on, slammed, and vibrated for hours at a time. And unlike a cabinet door at home, a boat hatch is trying to open itself every time you hit a wave.
Most failures come down to two things: corrosion seizing the mechanism, and fatigue from a latch that was never strong enough for the job. Both are avoidable at the checkout page, which is the cheapest place to fix them.
Material: 316 Stainless or Marine Polymer
Use 316 stainless or marine-grade polymer. Lesser metals rust and seize in salt air, turning a simple latch into a frozen mess you end up drilling out.
Chromed brass and zinc hardware can look identical to stainless on the shelf, and the difference shows up a season later as pitting, green corrosion, and a cam that will not turn. If a latch does not clearly state its material, assume the worst. Marine polymer latches, like Southco's catches or a nylon T-handle, are a legitimate choice too: they never corrode, they are gentle on gelcoat, and for interior and light-duty hatches they outlast cheap metal every time.
Flush vs. Surface Mount
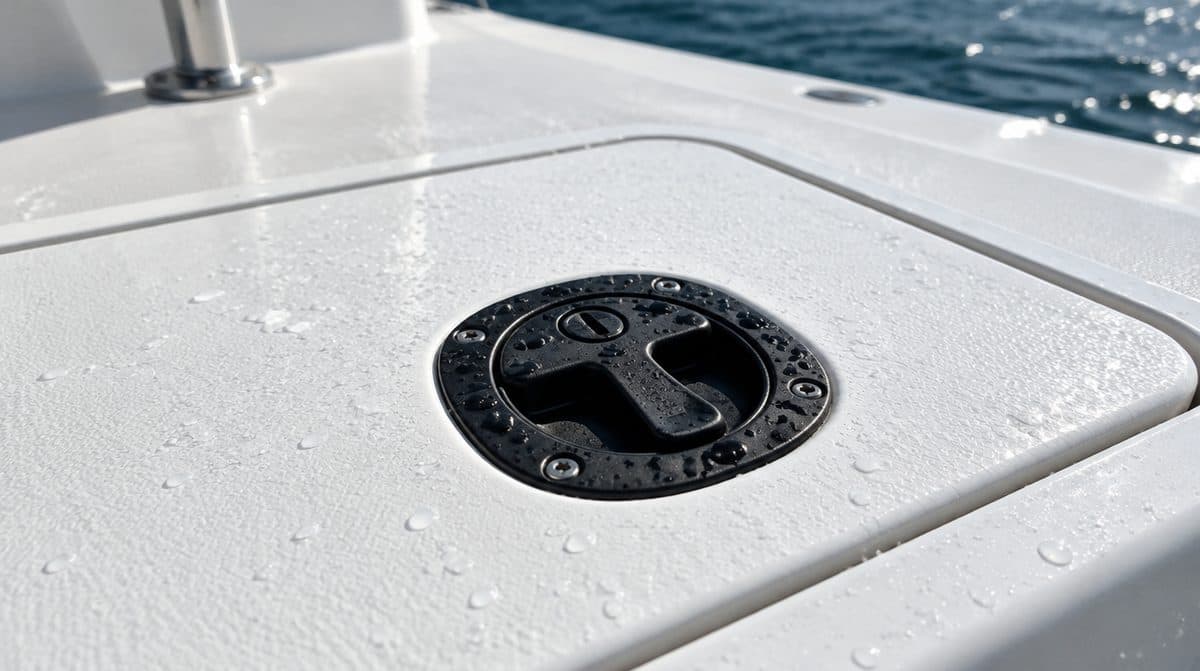
- Flush latches sit flat with the deck or hatch surface, so lines do not snag and bare feet do not catch. They are the right call for cockpit soles, casting decks, and anywhere people walk.
- Surface mount latches are easier to install, since they need less precise cutouts, and they are fine on vertical faces, inside consoles, and anywhere snagging is not a concern.
A toe caught on a proud latch at speed is a genuinely bad moment. On any walking surface, flush wins.
Compression, Slam, Cam, and Locking: Match the Function
Match the latch to how the hatch needs to seal and secure.
- Compression latches pull the hatch down tight against its gasket as you turn the handle, squeezing out the gap that water sneaks through. They are the choice for hatches over dry storage, electronics, and anything that takes spray or green water.
- Slam latches lock automatically when the lid closes. No turning, no fiddling, just shut it and it is caught. Ideal for fish boxes and frequently used compartments where crew will never bother with a two-step latch.
- Cam latches are the simple workhorse: turn the handle, a bar rotates behind the frame, done. Perko's flush cam latches come with straight or offset cam bars, and that detail matters; the offset reaches around a lip or frame that a straight bar cannot.
- Locking latches add a keyed cylinder so storage stays yours at the dock. Use them on compartments holding electronics, safety gear, and anything expensive enough to walk away.
- Barrel bolts and catches handle doors and lightweight panels where you just need things held shut, not sealed.
Sizing and Fit
Before ordering, measure three things: the cutout diameter or dimensions the latch body drops into (a common size for round flush latches is a 2.5 inch hole), the thickness of the hatch or door the latch clamps through, and the distance from the latch to the frame the cam bar has to catch. Adjustable cam bars buy you forgiveness on that last measurement, which is why they exist. Buying a latch that almost fits and then shimming it into submission is how leaks are born.
Installation Realities
Cut the hole carefully with a hole saw, test fit before sealant, and bed the flange in marine sealant so water cannot wick into the cutout edge. If the hatch is cored, seal the raw core at the cut with epoxy first. Snug the fasteners evenly; cranking one side distorts the flange and the latch will bind forever after. Then cycle it a dozen times before you call it done, with the hatch at its real-world angle.
Maintenance and Lifespan
A latch's enemies are salt and neglect, and both are cheap to beat. Rinse latches with fresh water when you wash the boat, work them open and closed so the rinse reaches the mechanism, and hit the pivots with a corrosion inhibitor a few times a season. Check gaskets under compression latches yearly; a flattened gasket means the latch can be perfectly tight and the hatch still leaks.
Signs It Needs Replacing
Replace a latch when the handle grinds or sticks even after lubrication, when the cam bar has visible wear or bends, when a slam latch stops catching reliably, or when you see rust bleeding from the mechanism. A latch that needs two hands and a prayer is already telling you how it ends.
From the Water
Spray latches and hinges with a marine corrosion inhibitor a few times a season. It keeps them moving and stops them from seizing. Make it a habit tied to something you already do, like the end-of-month washdown, and work each latch through its full travel while the film is fresh so it gets inside the mechanism instead of just sitting on top.
Where to Get It
Everything in this guide is stocked at Boat Supplies Direct, the Nautical Network marine parts store.
In stock as this guide goes up: - Perko flush mount latch with straight cam bar, 2.5 inch hole, black - Southco Grabber catch latch, side mount, black - Whitecap locking nylon T-handle, white
Browse the full range: - Shop latches - Read the full buying guide, including FAQs
More from the Wire
 Buying Guides
October 18, 2026
Starting vs. Deep Cycle: The Battery Mistake That Strands Boaters
Starting, deep cycle, or dual purpose, and flooded, AGM, or lithium. How to pick the battery type that will not leave you stranded.
Read more Buying Guides
October 18, 2026
The Onboard Charger: Cheap Insurance for Expensive Batteries
Batteries die young when they sit half-charged. How to size an onboard charger by amps, banks, and chemistry.
Read more Buying Guides
October 18, 2026
Battery Switches and Isolators: Never Get Stranded by a Dead Battery
The switch and isolator setup that keeps your starting battery ready while the house bank runs your gear.
Read more