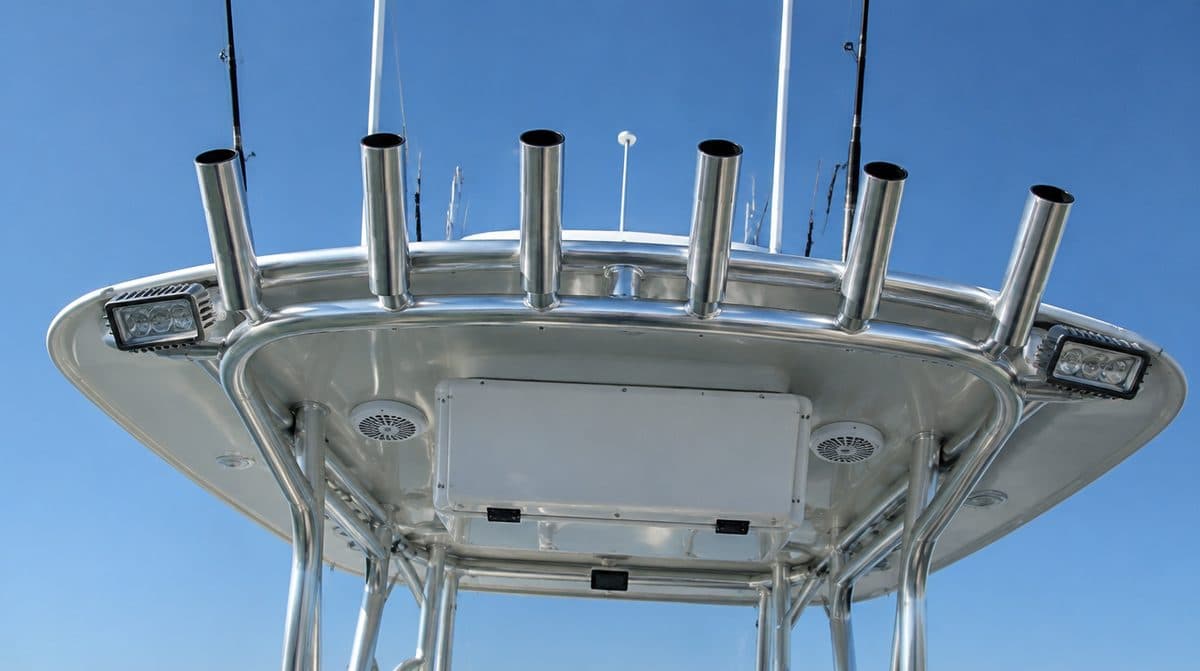
T-Top Accessories: Make the Most of Your Overhead Space
Rod holders, spreader lights, radio pods, outriggers: your T-top can carry far more than shade. Getting it right starts with one caliper measurement.
Your T-top is prime real estate for rods, lights, electronics, and storage. The right accessories make it the most useful part of the boat, and the wrong ones rattle, corrode, and come loose in chop. The good news is that outfitting a top well comes down to a handful of unglamorous details: one accurate measurement, decent materials, and hardware that is actually tightened the way the maker intended.
Measure the Tube Diameter First
Rod holders, lights, and brackets clamp to your T-top tubing, so measure the tube diameter and buy clamps that fit. The wrong clamp size is the top return reason, and it is entirely avoidable. Tubing diameters vary between builders, and a clamp that is close but not right either will not close or will not grip. Use calipers, measure in a couple of spots (tops are sometimes built from more than one tube size, with heavier legs and lighter overhead rails), and write the numbers down before you shop. If your tubing is powder coated or wrapped, measure over the coating, because that outer surface is what the clamp actually grips.
Rod Holders and Rocket Launchers
Overhead rod holders, usually called rocket launchers, are the classic T-top upgrade: they move rods up and out of the cockpit, keep tips safe from slamming hatches, and put a trolling spread within reach. Look for holders with a liner or a soft insert so your rod butts are not grinding on bare metal, and think about angle. Straight-up holders store rods; angled holders can fish. Mind your clearance too: rods overhead meet bridges, boat lift canopies, and garage doors before the top does.
Lights Overhead
Spreader lights facing aft turn the cockpit into a workspace for rigging at dawn and cleanup after dark, and a forward-facing light helps at the anchor or the ramp. Mount them where they light the deck without blinding the helm, which usually means angled down and outboard. Run the wiring inside a leg of the top if yours is rigged for it, leave a drip loop before every connection, and use heat-shrink terminals, because wiring at the top of an aluminum tube lives in constant spray. If fishing wire down a welded frame sounds like a lost afternoon, a verified marine electrician on Waypoint can do it cleanly.
Electronics Boxes and Radio Pods
An overhead electronics box gets your VHF, stereo head, and switch panels off the console and out of the spray. Pick a box sized for what is actually going in it plus one future addition, confirm the mounting pattern fits your top's rails, and make sure the door gasket is real rubber rather than decorative foam. Antenna mounts ride nicely up here too, where the extra height buys range. Plan the wiring at the same time as the box, not after: every cable that enters the box needs a sealed pass-through, and every one you add later means opening up finished work. Label both ends of each wire while the run is easy to trace, because in three years you will not remember which gray wire fed the stereo.
Outrigger Mounts
For offshore boats, the T-top or hardtop is where outrigger mounts live. These see real leverage under load, so this is the one accessory category where backing plates and through-bolting matter more than anywhere else on the top. Clamp-on gear can carry a light load; outriggers pulling against a spread in a seaway cannot rely on friction alone. Follow the mount maker's backing requirements exactly.
Storage Overhead
Life jacket racks, zippered storage bags, and net slings use the dead space above your head for the bulky, light stuff: PFDs, rain gear, towels. Keep it light up there. Weight carried high makes every roll a little worse, so the top gets the foam and fabric while the lead and batteries stay low.
Materials That Survive
Stainless and marine-grade polymer stand up to sun and salt. Avoid untreated aluminum hardware that corrodes, and be deliberate where stainless clamps meet aluminum tubing: isolate the metals with the rubber or polymer liners the clamp ships with, because bare stainless on bare aluminum in saltwater starts a slow electrolysis fight the aluminum always loses. Plastic that is not UV-stabilized chalks and cracks in a season or two of sun, so cheap hardware is a false economy twice over.
Mistakes to Avoid
The common failures are all preventable. Overtightening a clamp until it dents the tube, which weakens the frame and never actually improves grip. Skipping thread locker on fasteners that live in constant vibration. Using a clamp one size off with a strip of rubber stuffed in as a shim and hoping. Drilling holes in structural tubing without knowing what that does to its strength. And loading the top with so much gear that it hums like a tuning fork at cruise. Measure, buy the right size, tighten to snug plus thread locker, and the top will stay silent.
From the Water
Measure your T-top tubing with calipers, not a tape measure. Clamp sizes are precise, and a close guess often won't fit. Measure every tube you plan to clamp to, because the overhead rails and the legs are not always the same size.
Where to Get It
Everything in this guide is stocked at Boat Supplies Direct, the Nautical Network marine parts store.
In stock as this guide goes up: - Browse the full marine hardware collection
Browse the full range: - Shop marine hardware - Read the full buying guide, including FAQs
More from the Wire
 Buying Guides
October 18, 2026
Starting vs. Deep Cycle: The Battery Mistake That Strands Boaters
Starting, deep cycle, or dual purpose, and flooded, AGM, or lithium. How to pick the battery type that will not leave you stranded.
Read more Buying Guides
October 18, 2026
The Onboard Charger: Cheap Insurance for Expensive Batteries
Batteries die young when they sit half-charged. How to size an onboard charger by amps, banks, and chemistry.
Read more Buying Guides
October 18, 2026
Battery Switches and Isolators: Never Get Stranded by a Dead Battery
The switch and isolator setup that keeps your starting battery ready while the house bank runs your gear.
Read more